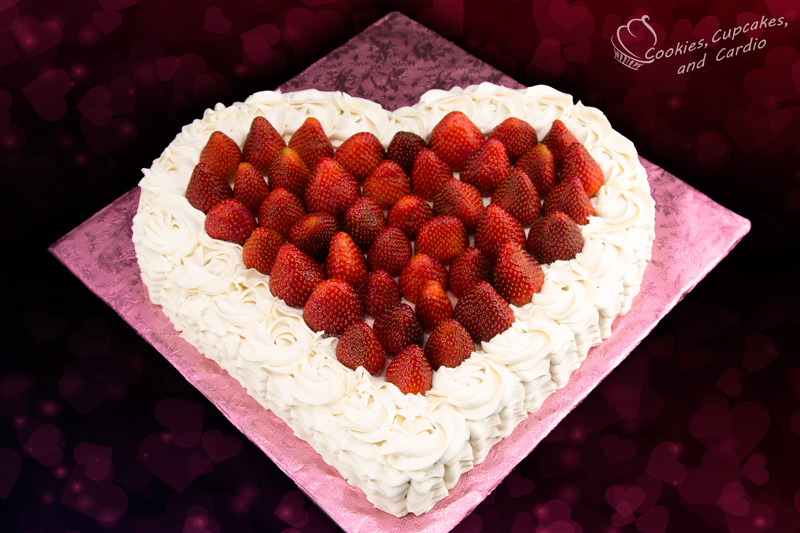
For this cake you don’t need to have a special pan. Though that would have been funny . . . “Here’s how you make a heart shaped cake. Take you heart shaped cake pan….” Annnnnnnnnd….CUT! Video done.
I have a sad sense of humour.
But seriously, this is a really easy way to make a heart shaped cake without the special pan. Collecting all of the awesome shaped pans is a storage nightmare. I recently just sold over 20 shaped character pans because seriously, when am I going to use those and they take up SO much room! I saved a couple of my favourites though to make a couple videos with.
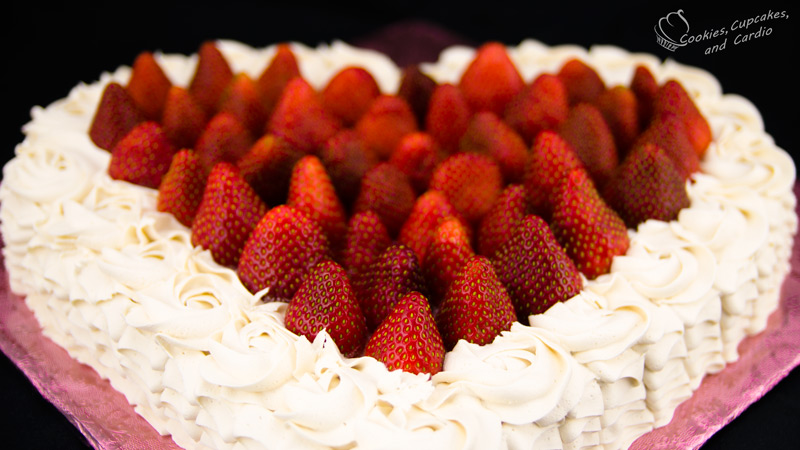
The strawberries on top of this cake add a beautiful pop of red to the cake, and I love the white/red contrasting colours. You could use any fruit though and I think it would still look beautiful. It would also make for a great wedding cake and you could theme the fruit with the colours of the wedding party! The possibilities are endless.
How to Make a Heart Shaped Cake
Ingredients:
8″ square cake
8″ round cake
white buttercream
2 pounds fresh strawberries
Wilton tip 104 and 1M
Procedure:
For this cake, you will need to make two cakes ahead of time. One a square and one a round cake. For the tutorial I used 8″ pans, but you can use any sized pans as long as they are the same size (e.g. 9″ round with 9″ square). Bake for required time that the recipe calls for and allow to cool completely.
Place the square cake in the lower corner of a square cake board (I used a 14″x 14″) or plate. Cut the round cake into two equal pieces and place one half on the side of the square cake and the other half on the adjacent side to make a heart shape.
Cover the cake with buttercream and smooth out any spots that might need to be filled. Allow the buttercream to harden by placing it in the freezer for about 15 minutes.
To ice the cake sides, take a piping bag fitted with a Wilton 104 tip and place the wide part of the tip against the side of the cake. Keep the bag vertical, and use a zigzag motion about an inch wide and travel up the side of the cake. Repeat this step all around the cake until all of the sides are covered in “ribbons”. Switching to a piping bag with a 1M tip, pipe rosettes using a circular motion around the border of the cake, where the ribbons come up to the top. A rosette can be piped by starting in the middle of it, and swirling around completely in a circle until a rose appears. Pipe a rosette border around the entire cake, leaving the center empty.
To finish the cake, slice the stems off of the strawberries and wash and dry them. Starting at the bottom tip of the empty heart space in the center, place a strawberry, with the cut large part facing down on the cake. Arrange the strawberries to cover the entire middle of the cake, making a large, red, heart shape from the strawberries.
**You may notice that the strawberries will weep a bit and collect on the buttercream. As long as you keep the cake flat, you shouldn’t have any problems and they make for a super moist, delicious cake!
**We have many cake flavours that you can try out here on the blog and they make for a great base for this cake, but if you find that you’re stuck for time and want to use a box mix, go ahead and that will work just fine!
Slice up and enjoy!


Your vanilla butter cream recipe yields how many cups?
It makes about 4-6 cups is my guess.
Lovely cake! How much butter cream is needed total to decorate this cake?
You can put on however much you want.
I was wondering how much buttercream do you use for this recipe?
It depends on how thick you want the buttercream. I always use lots- 6 cups at least!
These videos are so inspiring! I’m in culinary school and looking at your videos inspire me even more to want to pursue my dream as a baker and cake decorator! I love the videos you are very gifted!
I’m happy to hear you like them! Thanks for watching!
How far in advance can the cake be decorated? How do you keep the cut strawberries from “bleeding” all over the cake?
I wouldn’t put the strawberries on the cake until you are ready to serve it. The strawberries do run, but as long as you have a border along the edges of the cake, the juice should stay put. I wouldn’t decorate the cake more than 24 hours prior to serving it and make sure you keep it refrigerated.
Hello,
What recipe did you use for the two cakes?? Thanks!! They looks so yummy!!!!
I used my chocolate cake recipe.
Very cute, Jenn! I noticed that you always have such a nice cake board. Do you buy them that way or do you buy paper and then cover them with plastic wrap? Thanks much, and congrats on such a nice job!
Your fan,
Laura B
Hi Laura, I make all my boards by covering them in foil and then plastic wrap so that when I’m decorating them the foil doesn’t tear (had that happen too many times). I buy the boards or cut them from leftover cardboard.
Where do you buy the foil?
Thanks, Jenn.
You can get it at any cake store or on Amazon….here in Canada I have to order it as I live in such a small town. I order from Golda’s Kitchen but I’m not sure about shipping to the US.