Cookies, Cupcakes, and Cardio

Step by step homemade baking recipes

  • Home
  • Baking Bucket List
  • Recipes
    • Converting to Metric
  • About Me
    • What I Love to Love
    • Privacy Policy
    • Contact
  • Cookbook
  • Cakes
  • Cardio
    • Weights
    • Running
    • Spinning
    • Hiking
  • Cookies
  • Cupcakes
  • Tutorials
    • Videos
  • Other Baked Goodies
    • Holiday Baking
  • Randomness
    • What I’m Reading
    • The Beginning
    • Fortunate Fridays

Wilton Cake Courses: Week Two, Class One

January 28, 2011 by Jenn

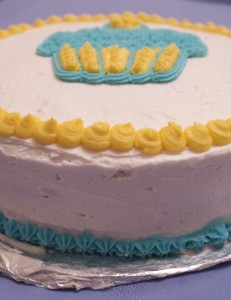
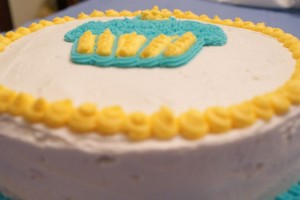
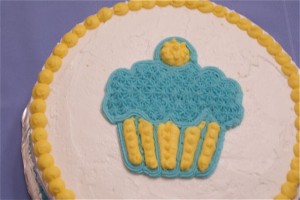
Last week in the basic Wilton decorating course, we were to bake (and torte) a cake.  If you missed my post about that, here it is:  Wilton Cake Courses: Week One, Class One.  Last week consisted on covering the basics on how to bake a cake, torte it and how to base ice it.  This week it was all about decorating!

We came to class with our cakes base iced (with the Wilton Buttercream *. . . you are required to use it for the course . . . even though it tastes like lard . . . it is better to decorate with), and our Wilton Instuctor went over the basic tips . . . round, star . . . and sizes.   On our cake boards, we practiced control of the flow, shape and size.

*Wilton Buttercream

STIFF:
1 tsp Clear vanilla extract*
2 tbsp Water
1 c Shortening
1 tbsp Wilton Meringue Powder
1 lb Sifted powdered sugar (4 cups)
MEDIUM:
1 tbsp Additional water
THIN:
2 tbsp Additional water
It was nice to get a refresher.  I say it like I knew what I was doing in the first place!.  It was nice to get formal instruction on how to hold the bags and how to position your hand . . . by a professional, in real life, not just on YouTube.

$80 Fee Breakthrough . . . this cake decorating stuff is EASY when you take a course!  It’s totally worth the money.  No, I’m not sponsored by Wilton, despite the fact that I sound like it!

A slow steady hand is best for this type of cake decorating.  The desire to hurry and fill in the space is great, but the slower I went, the better my stars turned out.

I still have lots to learn, and can’t wait to go back next week.  Oh, wait, I have Course Two to do tomorrow night!
PinterestShare
Filed Under: Cakes Tagged With: wilton buttercream icing, wilton cake class

Wilton Cake Courses- Week One, Class Two

January 27, 2011 by Jenn

In this Wilton Cake Course (Class Two), I am learning how to make flowers using Gum Paste and Fondant.

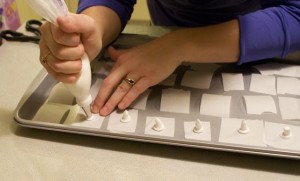
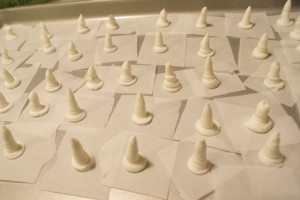
For next week’s class, we had to come with 30+ Royal Icing flower bases.  Oh, was my hand sore!

Here is who was watching while I worked . . .

Wilton Royal Icing Recipe

4 cups of icing sugar

3 tablespoons of meringue powder

5-6 tablespoons of room temperature water

Beat all ingredients until icing forms peaks (7-10 minutes at low speed with a heavy-duty mixer, 10-12 minutes at high speed with a hand-held mixer).

NOTE: Keep all utensils completely grease-free for proper icing consistency.

* For stiffer icing, use 1 tablespoon less water.

For the class this week, we will be building the Wilton Rose onto these bases.  Stay tuned 🙂

PinterestShare
Filed Under: Cakes Tagged With: royal icing, wilton cake class

Wilton Cake Courses- Week One, Class One

January 26, 2011 by Jenn

I signed up three cake classes that are being offered by Cranbrook’s Parks and Recreation group.

The first course (Class One) is teaching basic decorating skills.

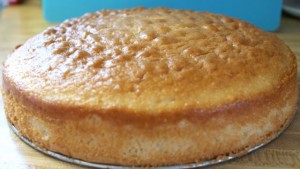
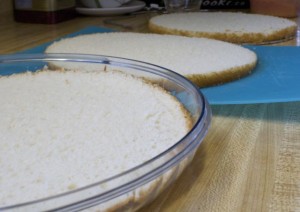
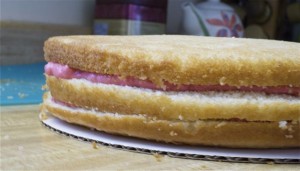
Our job this week was to come back to my Wednesday night class with a baked cake, iced with Wilton Icing, and extra cup of Icing to learn how to pipe flowers etc.  I decided that since I know what a cake is (that was seriously one of the steps of the first class), I would teach myself how to do something . . . and I double “torted” the cake.  Basically that just means that I cut my 10″ cake into three layers.

Step One: Lemon Raspberry Torte Cake

I used a cake leveller and this step was crazy simple!  You just change the height of your leveller and you come out with a smooth, even cake layer!

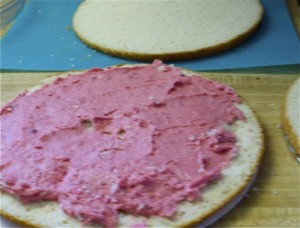
I put a layer of Raspberry Icing on the bottom layer, as this is what I had left over from the Giant Cupcake from yesterday.  I didn’t need to put a layer of icing around the outside as this raspberry icing is very thick….so thick I couldn’t spread it without the cake crumbling underneath it.

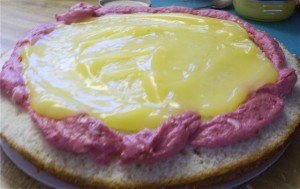
For the next layer, I used a lemon spread.  As this lemon spread was thinner than the raspberry icing, so I was worried about it spilling out of the sides, so I used the thicker raspberry icing to edge the cake.  Yup, it’s messy!  That stuff was THICK!

Torted cake!

All it needs now is the base coat, and it’s ready for Wednesday’s class.

PinterestShare
Filed Under: Cakes Tagged With: cake, lemon, raspberry, torte, wilton cake class

Happiness is Homemade

Join Me On:


Subscribe

Tags

baking birthday birthday cake birthday cakes buttercream cake cake decorating cake design cake pops cake recipe cake recipes cakes cakes cranbrook candy candy cake chocolate chocolate cake Christmas cookies Cookies Cupcakes and Cardio Cranbrook cranbrook cakes cupcake cupcakes Cupcakes and Cardio dessert easter fondant Halloween homemade how-to how to make how to make cake Icing jenn johns jj's custom cakery No Bake peanut butter rainbow Rainbow cake recipe surprise inside surprise inside cake valentine's day wedding cake

Site Stuff

  • RSS Feed Sign-Up
  • Privacy Policy

Return to top of page

Cookies, Cupcakes, and Cardio© 2025 • Design by Simply Chic Blog Boutique