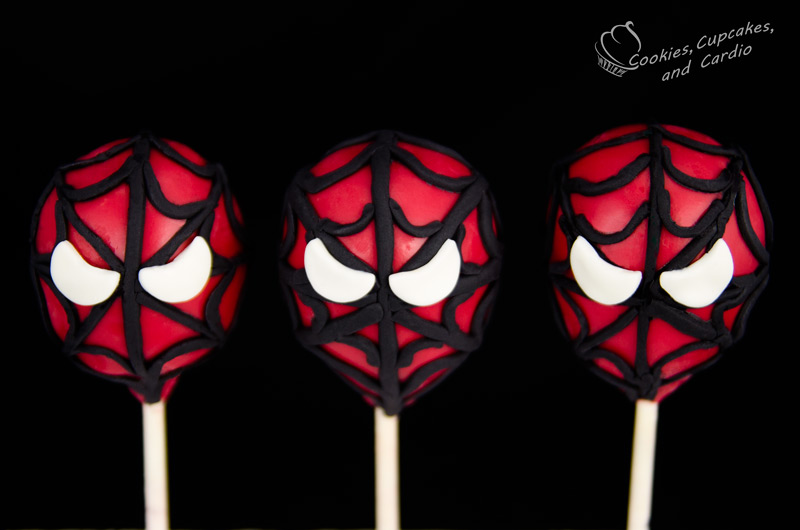
“Spiderman, Spiderman, does whatever a spider can . . . spins a web . . . something, something . . .”
Obviously I should work on my theme song lyrics before trying to sing them to you.
The new Spiderman movie, The Amazing Spider-Man 2 is coming out in a couple of weeks, and I’m super excited to see it. I think that’s because I spent hours watching the 80’s cartoon version at home with my brother. I’m one of those nostalgic type people who usually prefers the original version over the new, revamped versions of old shows, but in this case, I’m super excited to see the new effects that are worked into the current version! As a kid I always wanted web-shooters, and to be able to climb up buildings to see what was on top. But, instead what I got as an adult is Spider-man cake pops.
These cake pops are a tad bit tedious and will definitely take some time to put together. You may not want to make a 100 of these, but 12 would be manageable. There are a number of other ways to make the web on the mask of the cake pop, but I found the most clean version was to use fondant. You could try it with melted chocolate, but I don’t usually have luck with precision work when it comes to melted chocolate on top of cake pops. I prefer to use that combination when things can be a little messier.
I hope that you find this tutorial workable for your Spiderman project!
Does whatever a spider can
Spins a web, any size,
Catches thieves just like flies
Look Out!
Here comes the Spiderman. “
Spiderman Cake Pops
Cake Pop Ingredients:
- cake crumbs
- buttercream
- red melting wafers
- cake pop sticks
- black fondant
- white fondant (or white gum paste)
Procedure:
- Combine one cup of cake crumbs with 2 tablespoons of buttercream and blend together using your hands until you get a playdough like consistency. If the mixture is too wet, add more crumbs, too dry, add more buttercream.
- Using a small cookie scoop, scoop out equal portions of dough and roll each into a small ball. Slightly taper one end to narrow the neck area.
- Place each ball on a parchment lined baking tray.
- Melt the chocolate in the microwave in a microwave safe bowl, by using 30-60 second intervals at 50% power and stirring after each interval of time. When melted, dip lollipop stick a 1/4″ depth into the melted chocolate and insert into the narrow (neck) of the ball.
- Place cake pops into the freezer for about 10 minutes to harden the chocolate on the sticks.
- When sticks are set, coat cake pops completely by dipping balls into the melted chocolate, allow excess to drip off and stand upright to allow them to harden completely.
- Roll black fondant out thin and cut narrow strips. Using a small amount of water either on the back of the black strips or directly onto the cake pop, apply the first black strip vertically from the neck and up over the head on the cake pop. Apply the next piece of fondant horizontally across the centre of the cake pop, wrapping each stripe around to the back of the pop. Next, apply more strips of black fondant diagonally in between the horizontal and vertical strips in each quadrant.
- Roll out the white gum paste/fondant and cut a small half moon shape out using a circle cutter, or a half moon shape (mine is from Ateco). Using water to attach, apply to two white moon cutters near the point where all of the lines meet, with the cut out portion facing the top of the cake pop.


Loved the video. Thanks for posting.
Thanks so much for watching! I’m glad you liked it.