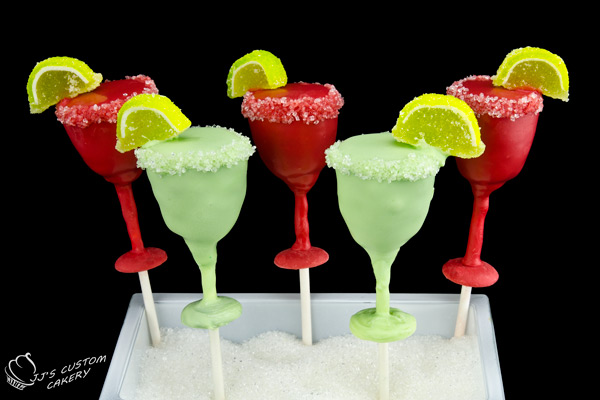
These cake pops are the greatest thing to bring to a backyard party or barbeque for summer!! I originally made them with Cinco de Mayo in mind, but now that I’m finally getting around to making the blog post, they’re perfect for summer . . . or next year’s fifth of May!
Margarita Cake Pops
You can make as many of these cake pops as you wish, depending on the amount of cake pop filling you make. Approximately one cup (240 milliliters) of crumbs will make three cake pops.
Ingredients:
-
Cake crumbs
-
Prepared buttercream
-
Cake pop/lollipop sticks
-
Coloured candy melts *reserve one candy melt per pop for the base of the glass
-
Cake pop/lollipop sticks
-
Sanding sugar
-
Mini lime sugar candies
Procedure:
-
Combine cake crumbs with buttercream and blend together using your hands until you get a play dough like consistency. If the mixture is too wet, add more crumbs, too dry, add more buttercream.
-
Using a small cookie scoop, scoop out equal portions of cake pop filling and roll each into a small ball. Shape the cake pop into a rounded prism-like shape to imitate the top of the margarita glass. Place each prism on a parchment lined baking tray and set aside.
-
Melt the candy melts in the microwave in a microwave safe bowl, by using 30-60 second intervals at 50% power and stir repeatedly after each interval of time.
-
When chocolate is melted and no chocolate chunks remain, dip 1 inch (2.5 centimeter) of a lollipop stick into the melted chocolate and insert the dipped portion of the stick into the narrow portion of the prism (the base of the margarita glass). Repeat as required for each cake pop.
-
Take tray with cake pops and place into the freezer for about 10 minutes to harden the chocolate on the sticks.
-
When sticks are set, remove pops from freezer, and coat cake pops completely by dipping the prisms into the melted chocolate (re-melt chocolate if necessary), allow the excess chocolate to drip off and stand cake pop upright in a cake pop stand and allow them to harden completely. Repeat for required number of cake pops.
-
After the pops have dried, make a small hole in the centre of one of the reserved melts. Slide the candy melt onto the end of the pop stick and up about 1.5 inches (3.8 centimeters) from the bottom of the pop. This is the base of the glass. Once it is in place, coat the actual stick between the cake pop and the wafer with the melted chocolate. This is the stem of the glass.
-
To add the finishing touches to the cake pop, pipe a fine line of melted chocolate along the rim of the glass, and roll it in the sanding sugar to coat the rim.
-
Add additional melted chocolate to attach the mini lime candies.
- Allow to harden completely in a cake pop stand before serving, and serve when desired, or store in a sealed container in the refrigerator for up to 2-3 days.
I hope you enjoyed the tutorial!
Happy Baking!


