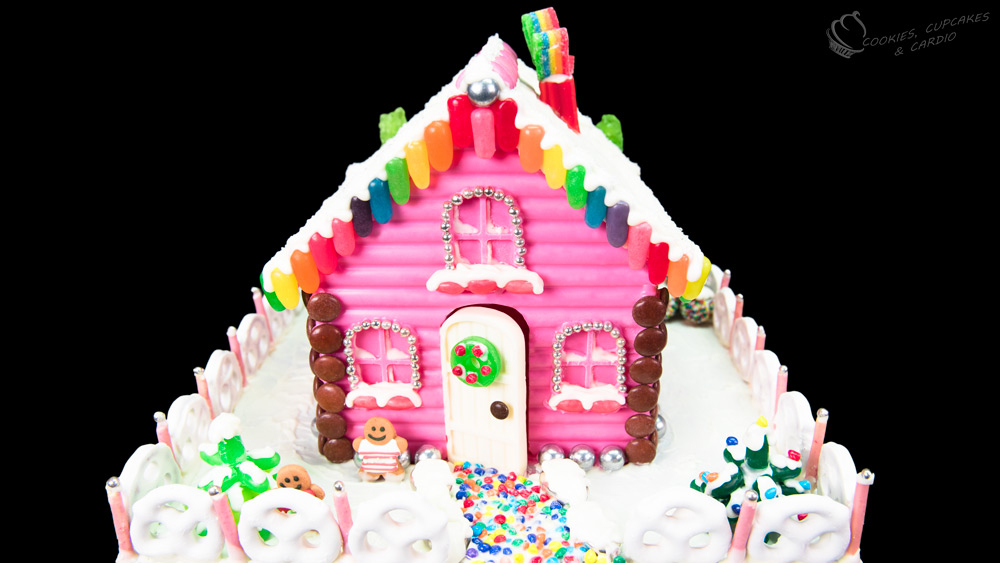
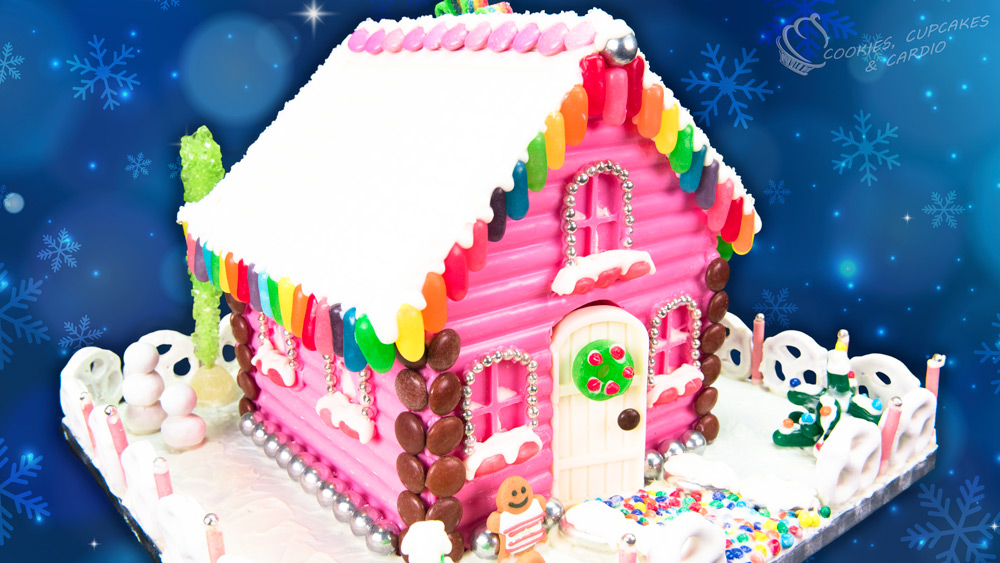
Today I’m showing you the first of many Christmas recipes for this year! In today’s tutorial, I am making a Chocolate Christmas House, from a gingerbread silicone mold! You can make a regular gingerbread house if you wish (tutorial here) or you can try out a chocolate Gingerbread House for something new!
Subscribe to Cupcakes and Cardio!
Every year I like to make a gingerbread house but this year I wanted to change it up a bit and make one out of chocolate! I found a gingerbread silicone mold last year, and never got around to trying it out, so I knew exactly what I wanted to make for this year. The mold is super simple to use, and the chocolate comes out easily- no need to grease the mold! I’m testing it in the dishwasher tonight, but the packaging says it’s safe for the dishwasher, oven etc. You could make my homemade gingerbread dough and press it into the mold cavities and make a gingerbread house that way too! It’s pretty versatile. The link to buy the one that I did is below.
You need lots of different candy and chocolate to make this house. In the tutorial, I show you exactly what I did, but you can change up any of the elements that you want. I usually pick up cool candies throughout the year while I’m out shopping, and collect them for projects such as this. The truth is, I randomly buy fun candies with no idea as to how I’m going to use them and have a giant candy mess in a room that is supposed to be our spare room. Sorry house guests.
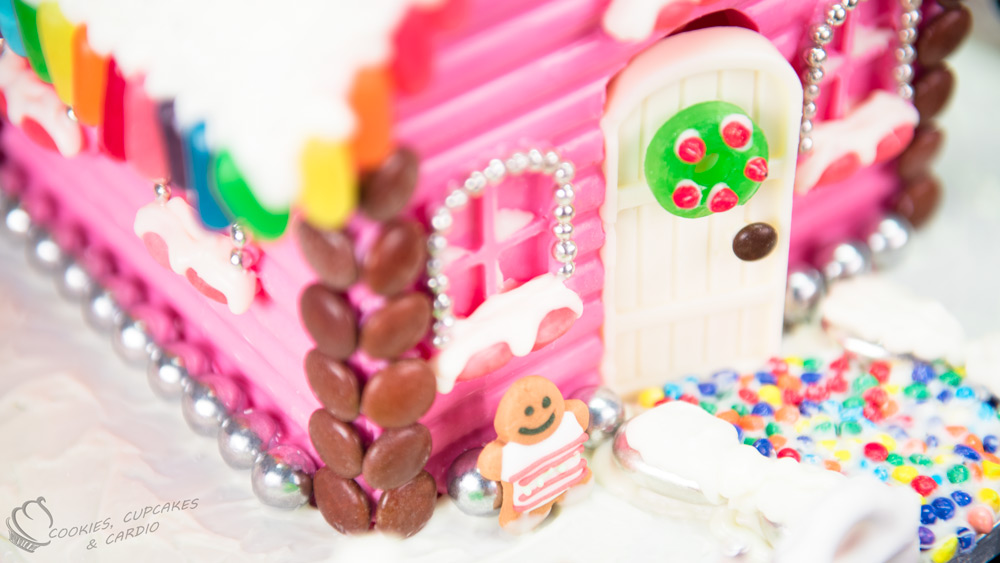
Despite the mess in the “candy room”, I love the amount of candy on this house! It’s cute and colourful . . . how could you not love something that is so adorable?! There are rainbow icicles coming off of the roof, adorable trees in the front and back yard, a wreath made from a life saver, rainbow smoke from the candy chimney, and best of all, the walls and roof are totally chocolate! The white coated preztels and strawberry pocky complete the yard with a fence and the house is my dream house! I would definitely have sweet dreams there. Get it? Sweet dreams!
Chocolate Gingerbread House
Ingredients:
- Gingerbread Silicone Mold
- Chocolate- white and pink
- Mike and Ike candies (rainbow lights/icicles and trees)
- Rainbow bits (walkway, and wreath accents)
- Pink jelly beans (ledges under windows)
- Pink and brown Smarties (corners and peak of house)
- Silver cola balls (edging for house)
- Silver candy covered almonds (path edging)
- Silver dragees (edging of windows)
- Airhead rainbow strip (smoke)
- Galaxy candy (chimney- rectangle shaped)
- White, round candy (snowmen)
- 4 Gum drops (backyard trees)
- 4 Rock candy on a stick (backyard trees)
- Clear sanding sugar (snow)
- Rainbow gum balls (yard bushes)
- Mini brown M&M (door knob)
- Green Life Saver (wreath for door)
- White yogurt covered pretzels (fence)
- Strawberry Pocky (fence posts)
Procedure:
- Melt chocolate in microwavable containers on 50% power for 1 minute intervals, stirring after each minute until completely melted.
- Place silicone gingerbread house mold mats on baking trays. Using the pink chocolate, fill the sides, front and back panels of the house. Fill the roof and doorway with white chocolate. Tap the trays on the counter to remove air bubbles. Place trays in the fridge to harden for 20 minutes.
- Once hardened, use melted pink chocolate to assemble walls of the house. To help support the sides while the chocolate is hardening, use a can or bottle to hold walls upright.
- Attach roof with additional melted pink chocolate, using a jar or can to support as necessary.
- Using pink chocolate, line corners of the house with brown Smarties in a straight vertical line.
- Windows- using pink chocolate, cover each of the window sills with silver dragees, line the ledges with pink jelly beans, and place a dollop of white chocolate in the left hand bottom corner of each window panel for “snow” and spread snow upwards and to the right.
- Roof- using white chocolate line roof peak with pink smarties, line edging of roof with rainbow Mike and Ike’s.
- Door- using white chocolate, stick the mini M&M to the door knob place, and attach the wreath and red “berry” accents to the center of the door. Glue in place.
- Trees- using white chocolate, glue 4-5 green Mike and Ikes together, then 3-4 more on top of the bottom. Repeat again with 2-3 more branches for the tree, and a single candy placed vertically for the top branch. To make the rock candy trees, use a sharp tool to make a guide hole in the top of the white gum drops, and insert the rock candy stick into the hole and stand tree upright.
- Snowmen- stack white snow ball like candies 2-3 balls high to make snowmen for the yard, using white chocolate to attach.
- Bushes- cover rainbow gum balls with dripping white chocolate and glue 3 balls together, with one on top.
- Chimney- using white chocolate, glue rectangle candies together and allow to harden. Cut bottom at an angle to match the pitch of the roof.
- Smoke- using an Airhead rainbow strip of candy, accordion fold and place a small amount of white chocolate in between folds to glue together. Place a heavy item on top of the folded strip to keep the folds together until the chocolate hardens. Attach to the chimney, and then to the roof of the house.
- House edging- place a strip of white chocolate on the cake board, and place a silver coca cola ball on top, next to the base of the house.
- Path- cover the area in front of the doorway with white chocolate and place silver almonds in place on either side of the door, leading to the edge of the cake board.
- Snow cover-cover the cake board, roof peak, rainbow icicles/lights, trees, and window ledges with white chocolate, and then sanding sugar to give it shine.
- Fence- using white chocolate, cover the edge of the board with alternating fence posts made from strawberry pocky. To make the fence posts, cut the pock into 1 1/4″ long pieces and use chocolate to attach dragees in place at the top of the post.
- Keep your chocolate gingerbread Christmas house on display for as long as you desire. If planning to consume, keep refrigerated and finish within 2-3 days.
If you are interested in learning how to make a more traditional gingerbread house, here’s my tutorial on how to do that! It’s so yummy!!


Mary M – I think if you make sure to do it at 50% power in the MW, it should not scorch. I recently used melting chocolate from Wilton, and melted in disposable decorating bags, for 20-30 seconds at a time. Pick up and squeeze to see if it’s melted. Don’t snip the tip until it’s all melted! Good luck! It’s too late from Christmas, but I’m think of making a Valentine house in Feb!
How much melted chocolate should I use to make this?
Hey jen My name is Enfinniti My birthday is on December 5,2015 and i would appreciate if u could bake a cake on my detonation Im going to be 12 dec.5 thank love and watched ALL ur videos ur the best
were did you get the Salted Dulce de Leche it looks so delicious also were did you get the Canadian smarties
Hi Jenn. Great tutorial as usual. I have a question regarding the melted chocolate in the piping bag. I have trouble melting chocolate. It always scorches no matter stove top method or microwave. What is the secret to melting chocolate? Do you melt yours in the micro in the bag? Please help.