Skittles Poke Cake with Skittles Buttercream- Collab with MyCupcakeAddiction!
How to Make Lollipops and Hard Candy
I had never tried to make my own candy up until three weeks ago, and now, hot diggity, I’m an expert!
I was scared of the candy thermometer.
No need to be scared of it people- it is surprisingly easy! You can get away with NOT using a candy thermometer, and using the “cold water test” but I found that way unreliable.
To make your own candy you need very few ingredients- sugar, corn syrup, candy flavouring and water. You can skip the flavouring if you want, but that’s the best part! I found all of my flavours, and many more, at Bulk Barn. I know you can also find them at many online sources, while Amazon and ebay will have lots of choices for you.
The only difficulty that making homemade candy presents, is the act of patience. The liquid seems to heat up fairly quickly to 200F, and then . . . nothing. Wait, and wait, and wait while the thermometer ever so slowly climbs past 200F on it’s way to 300F! I didn’t want to leave the candy on the stove unattended, so I each time I made it, I patiently sat stirring, and watching each. and. every. notch. on. the. thermometer. rise. Once it’s up to temperature, you have to work quickly. The candy will start to harden as soon as you remove it from the heat, so you want to add your flavour and colour, and get it into the molds, or onto the pan quickly. Be careful not to touch the syrup though, as it is HOT!
Once the candy is cooled in the molds, you can easily pop them out. If you have chosen to pour it onto a pan, you can smash it up, or cut it up quite easily. Coming up at the end of this week, we will be releasing our MUCH requested Frozen cake! In order to make the Frozen cake, you need to know how to make hard candy.
How to Make a Giant Gummy Bear and other Gummy Candy
Although I stupidly sound like this is a sponsored video, be assured that it is NOT!! I paid $29 CAN for this fun machine at *cough* WalMart *cough* . Would I admit that I shop at WalMart if I didn’t have to?
This machine looked really cool when I saw it on the shelf (thanks to Paul for pointing me to it!). I knew that if I had kids at home, I would love to hear an unbiased review of it before I committed to purchasing it. So here it is . . . it is fun, bright, and easy to use, but if you already have silicone moulds at home, or know where to find them, you can save yourself $29 and use them and the microwave.
Making gummies is super easy, all you need is gelatin, Jello and water! If you’re so inclined, so can replace the water in the mixture with fruit juice for an extra fruity flavour. I believe that the required amount of unflavoured gelatin powder creates the perfect chewiness, but if you find it too chewy, you can cut back one package. The molds that are included in the machine are for a giant gummy bear, gummy worms, gummy fish and other gummy bears.
I hope you enjoy this review and making your own gummy bears!!
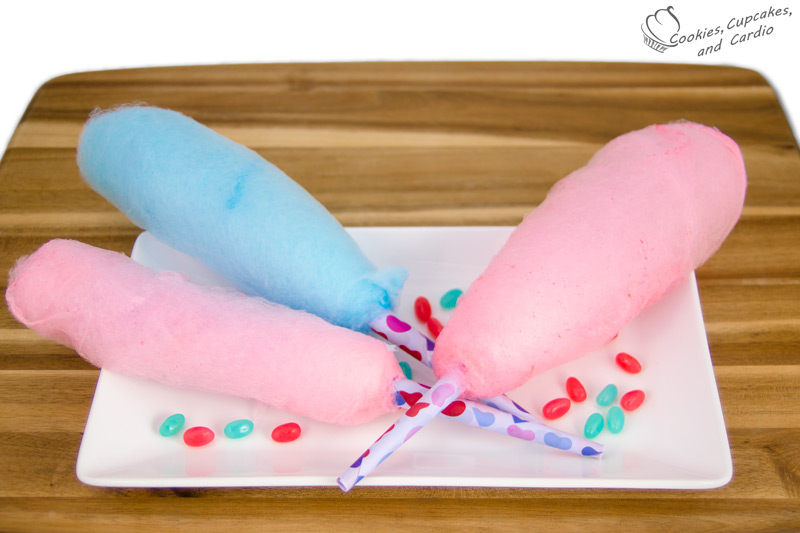
How to Make Cotton Candy – Jelly Belly Cotton Candy Machine
First off, I think that North America should formally recognize cotton candy the way the Australians do- Fairy Floss- from now on. How much more fun is that name?!?! It sounds so sweet.
As a child, I spent my time at the fair watching the cotton candy man “stir” the cotton candy to make beautiful puffy clouds of blue and pink. It kept my attention for a whole 30 seconds or so, which is quite good considering all the distractions on the fair grounds. Every year at the end of August, my parents would take us to the PNE (Pacific National Exhibition) which is a 17 day fair in Vancouver, BC. It has rides, exhibits, show homes, trade shows, and of course, FAIR FOOD! Obviously, being who I am, the food was my favourite part.
Unfortunately for me, no one paid me money to make this video. I was hanging out in my favourite store (Target) and saw the box for the Jelly Belly Cotton Candy Maker. I knew that I had to figure out how to make cotton candy at home. I followed the enclosed directions, which were easy to follow, put the machine together, and started right away. I feel that this machine is great for people of all ages! *The inner core get quite hot, so kids should definitely be supervised while using the machine.*
My machine came with 6 cotton candy cones as a “bonus” but what would have also been nice would have been the inclusion of the sugars. I tried making cotton candy with granulated sugar, and it worked, so perhaps that is why flavoured sugar isn’t included in the machine package, but who wants to make white cotton candy?? I purchased an additional pack (Jelly Belly Cotton Candy Making Kit) of 2 different flavoured sugars (blue/pink) and more cones for another $20. If you are a died hard cotton candy fan, this would be a great investment, but if you are looking to make cotton candy for the masses, you probably want a machine that is larger and faster. It takes 5 minutes for the machine to heat up, another 1-2 minutes for the sugar to start to floss once added, and another 1-2 minutes to collect the spun sugar onto the cone.
Once the sugar is spinning, rolling the cone along the flossing ring can take some getting used to, but as long as you are moving the cone and “catching” the floss, there is not really a right/wrong way to do it. Stay away from the centre core though, as it’s heat will melt your spun candy, and it will also slice into your neatly piled floss! All in all I think this is a great, fun machine! If you’d like to see more machine reviews, let me know in the comment section!
How to Make a Wedding Cake: Stacking a 3 Tier Wedding Cake (Part 2)
How to Make a Wedding Cake-Baking and Frosting Part One
I have almost 70 wedding cakes under my belt. That’s not a lot of wedding cakes if you are a professional cake wedding decorator, but it was a lot to pump out in a three year span as a rookie! Year one was a learning experience, year two putting practice into action, and year three was fine tuning the practice.
Baking wedding cakes were some of the most reward-able cakes that I got to be a part of. I LOVED making them, loved getting to the venue and seeing the beautiful decorations, but I HATED the delivery!! Nothing ever went wrong, but I was always nervous throughout the drive. The longer drives (hour to an hour and a half) in the hot beating sun were often scary, as was travelling on the highway and worrying about the other drivers on the road. If you are partaking on long deliveries, make sure that your vehicle has air conditioning, and that you put blinders up on your windows to block the sun (as much as it can be). I also always transported my cakes in a large cake delivery box, that my partner made for me. Delivering in the box kept wayward dust and dirt off of the cake and ensured that a clean cake arrived at the destination.
In this first tutorial (of three), I show you how to bake the cakes for the wedding cake. I highly recommend using cakes from scratch as they are sturdier than box mixes, and will hold up better under movement and the weight of decorations.
How to Make a Pink Zebra Cake
It is sunny and warm in LA!! We are in LA again for a week of filming and workshops at YouTube Space LA, and it has been so nice to escape the dreary winter weather we’d been having up in Canada. It feels like paradise right now . . . short sleeves, bare legs . . . American Target. Life is good! All I need now is a sprinkle covered cupcake and it would be complete. As I alluded to last post, it’s not all happiness right now, my friend on-screen and off, Beth from the YouTube channel CookingandCrafting, is going through some very challenging times with a sick family member. If you know Beth you will know how close she is with her family. They need your help. If you can donate any amount, please consider sending it to her brother Scott to help him on his road to recovery. The link to the medical fundraiser is here- http://www.youcaring.com/medical-fundraiser/help-scott-get-better-/133503.


