Today I am showing you how to make an ADORABLE and mesmerizing Cadbury Mini Eggs Cake. If you’ve got an eye for perfectly aligned mini eggs, this cake is for you!
What’s your favourite Easter chocolate? Judging from this cake, mine is clearly mini eggs, though it used to be creme eggs. I haven’t even had a single creme egg this year. I think last year I was so obsessed with creme eggs I must have over ate them! Now this year, I can’t stop eating mini eggs, which likely means I’ll never eat them again. As long as they stop inventing Easter chocolates, I’ll eventually run out of obsessions.
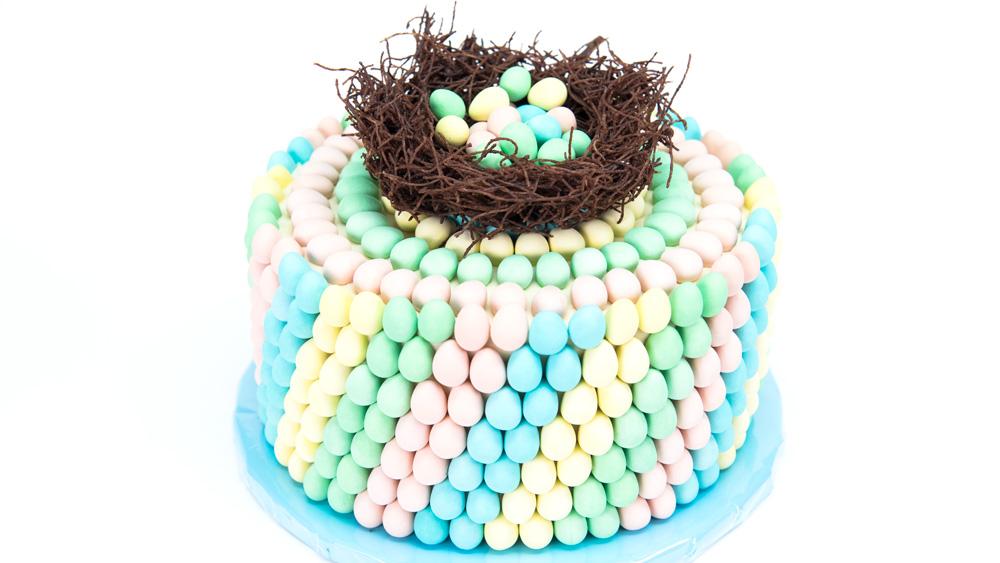
The perfect pastel lines of this cake make me very happy. I’m a loser, I know. I don’t do anything perfectly (who does!?), but when I was working on this cake, it was so easy to line the eggs up in these beautiful straight lines. Somehow, it came out looking perfectly arranged, so I’m happy to pretend that I am this way all the time. The nest on top is completely edible, and compliments the pastel so well. I made a previous post about how to make the edible chocolate nests, so make sure you check that out too.
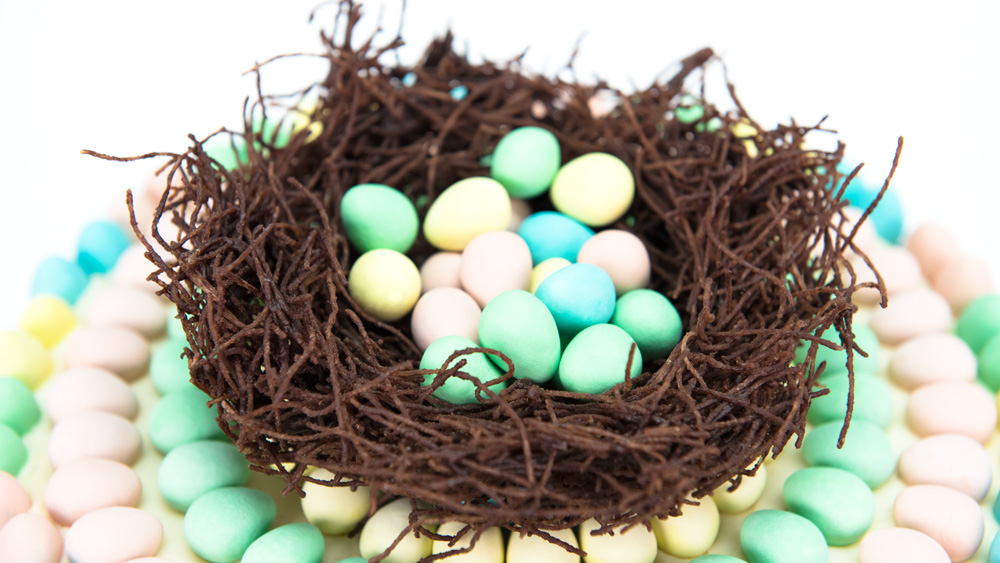
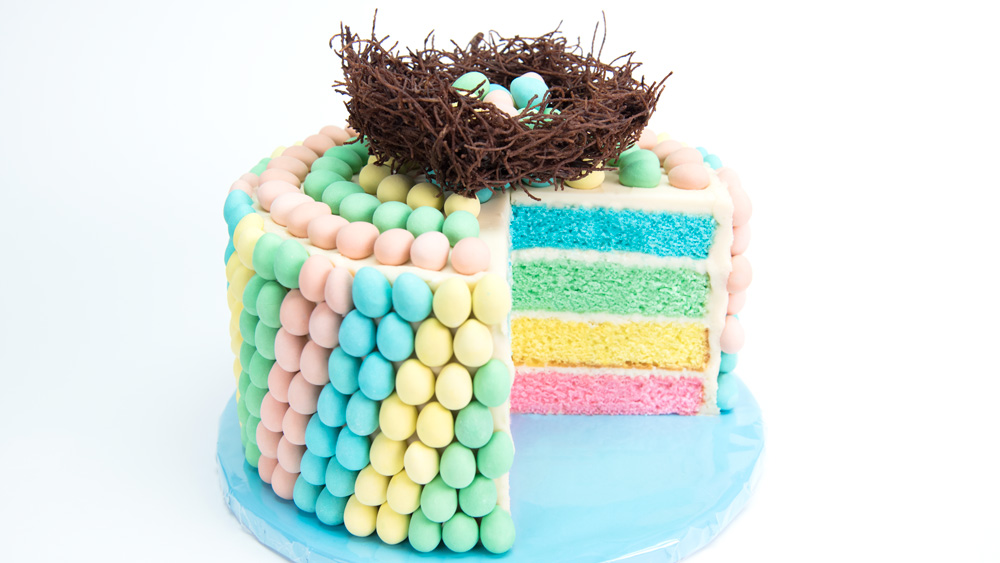
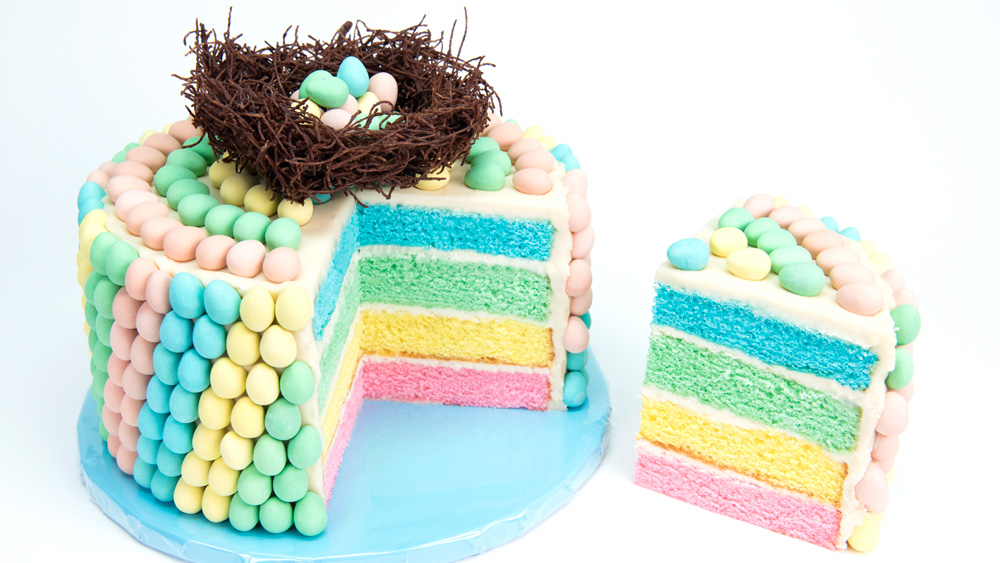
When I think Mini Eggs, of course I think chocolate. So when I was trying to come up with a cake design inside, I decided to go with vanilla, as I dare say all those mini eggs, AND a chocolate cake inside may have been chocolate over kill. I might be wrong so let me know if you disagree. I wanted to capture the outside design of the mini eggs on the inside as well, so I set out trying to match the shades of the chocolates for each layer. It ended up being surprisingly easy. Usually I use Americolor gel paste, but I branched out and use Wilton Color Right System, which is way better than their gel pots.
The outside of the cake has so much going on that it kind of worked well to have the inside be a bit simpler, but still a surprise to the person cutting into the cake. Surprise inside cakes are the best!
Cadbury Mini Eggs Cake (Chocolate Easter Egg Cake)
Ingredients:
- Vanilla cake batter
- Gel paste coloring
- Vanilla buttercream
- Cadbury Mini Eggs
- Chocolate Nest
Procedure:
- Prepare cake batter and buttercream.
- Divide cake batter into four equal portions in four different bowls.
- Color them in pastel pink, pastel yellow, pastel green, and pastel blue.
- Place into four baking pans and bake for 25-30 minutes.
- Allow to cool completely on a drying rack.
- Place one cake layer on a cake board or platter, and cover in buttercream. Stack a second layer on top and cover in buttercream. Repeat with 2 more layers of cake. Cover the entire cake in buttercream.
- Separate mini eggs by color and add to the cake two at a time. E.g. place two yellow mini eggs, then two pink, then two blue, then two green and repeat that pattern all along the base of the cake. When moving up to the second row of mini eggs, make sure that you place the eggs, off to the right slightly from the ones below.
- When at the top, make a ring of one single color around the outside edge of the cake. Switch colors and make a second ring, working towards the center. Repeat with single color rings until you reach the center.
- Place the chocolate nest on top.
- Slice with a sharp knife, and serve when desired. The cake is best consumed within 2-3 days and should be kept in the fridge.
How to Make Edible Chocolate Nests filled with Cadbury Mini Eggs:



Hi,
I was wondering if you posted your cake and icing recipe somewhere. This cake looks absolutely amazing. My girls are excited to make it with me. If you are not posting your recipe, do you double one cake recipe?
Cherylene
I didn’t link it, but thanks to you, I’ve added it in.
That’s so cute!! I love it!!
Would you tell me approximately how much longer till my piano cupcakes will be made? I keep checking to see if it’s up yet. Thanks so much 🙂