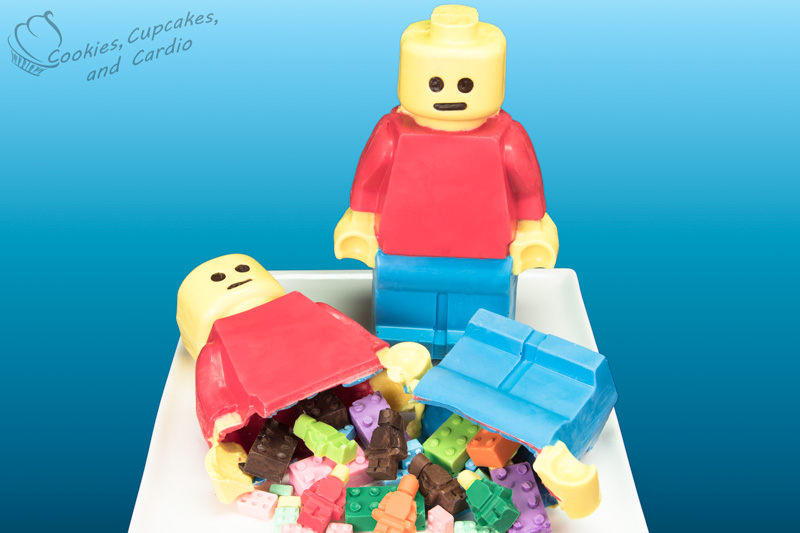
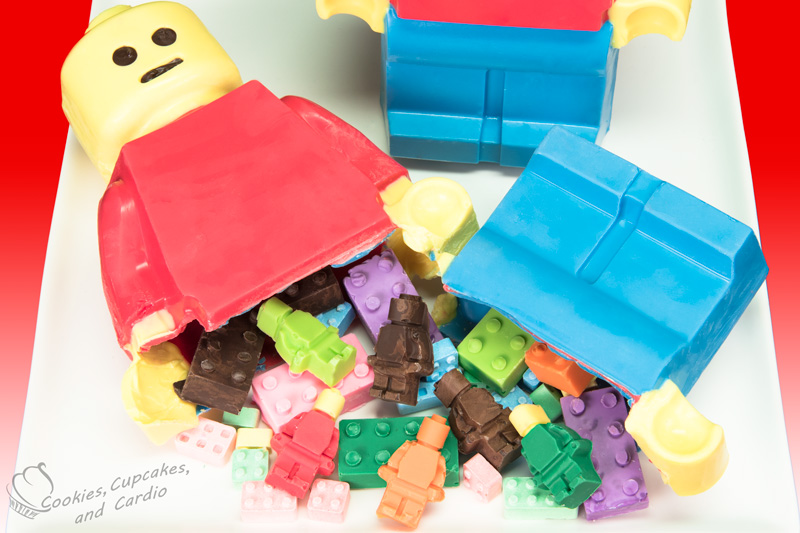
I have had this Lego man mold for months. MONTHS. I guess I figured I could put something Lego on the back burner since it’s been around for decades. But, finally I have created something worth waiting for- a giant Lego man made out of chocolate and filled with candy, just like a pinata!
The reason that I use melting wafers for this project is that they are super easy to work with. They come coloured, taste decent, and you don’t have to worry about tempering the chocolate or anything- who has time for that?!? If you’re having problems with the melting chocolate, which can happen, even with the wafers, make sure that your chocolate is fresh. Since I don’t tend to use obscure colours very often, sometimes when I go to use them from the back of the cupboard, they just won’t melt right, or coat the product correctly. If that happens, I usually throw them out, and go to the store to get fresher melts. I hate to waste them, but I’ve learned it’s not worth the fight!
For the first coat of chocolate, you will need to be super neat. I used a small paintbrush to keep my lines clean and straight. When I was testing my idea, the chocolate figure broke at the neck, waist and down at the bottom, where the feet are. Those areas are the weak spots in the mold, so make sure to put lots of chocolate there once you have your initial coat on.
To match the two figures up (you’ll have to make two lego men to make one whole 3D one), simply fill in the gaps on the sides with additional melted chocolate. To stand the figure up, you may have to do a bit of trimming at the bottom, where the 2 sections of the feet meet. The mold is slanted slightly, but oddly, that makes it stand up easier.
If desired, you can use a Lego block mold, and mini Lego men mold to fill the inside of the pinata. Otherwise, find yourself some candy blocks, or your favourite sweets and stuff the inside full!
3D Chocolate Lego Man Pinata
Ingredients:
- yellow melting wafers
- red melting wafers
- blue melting wafers
- chocolate (melted in piping bag)
- Lego man mold, mini blocks mold, mini Lego figurines mold
- Melt chocolate wafers in the microwave on 50% power for one minute intervals until melted.
- Place mold in a baking pan, and support arms/hands with rolled up paper towel.
- Fill the head and hand cavities with yellow chocolate, applying carefully around the inner edges. Place mold in fridge to harden and set for 5-10 mins.
- Fill the leg cavities with blue chocolate, applying carefully around the inner edges and where the colours meet. Place mold in fridge to harden and set for 5-10 mins.
- Fill the chest and arm cavities with red chocolate, applying carefully where the colours meet. Place mold in fridge to harden and set for 5-10 mins.
- Place chocolate in fridge to harden and set for 5-10 mins.
- Apply a second coat of chocolate, covering weak points with lots of chocolate.
- Allow to harden in the fridge for 2-4 hours.
- Remove from mold, and repeat steps 3-7 for second half of body.
- Fill Lego blocks and mini Lego figurines with excess chocolate and allow to harden before popping out (like an ice cube).
- Fill half of the pinata mold with mini Lego pieces.
- Place second half of Lego mold on top of the other half. Fill in gaps with excess chocolate.
- Allow to harden before moving.
- Store in the fridge until ready to break open!


This is great especially for the kids. They surely love this. Thanks for sharing.