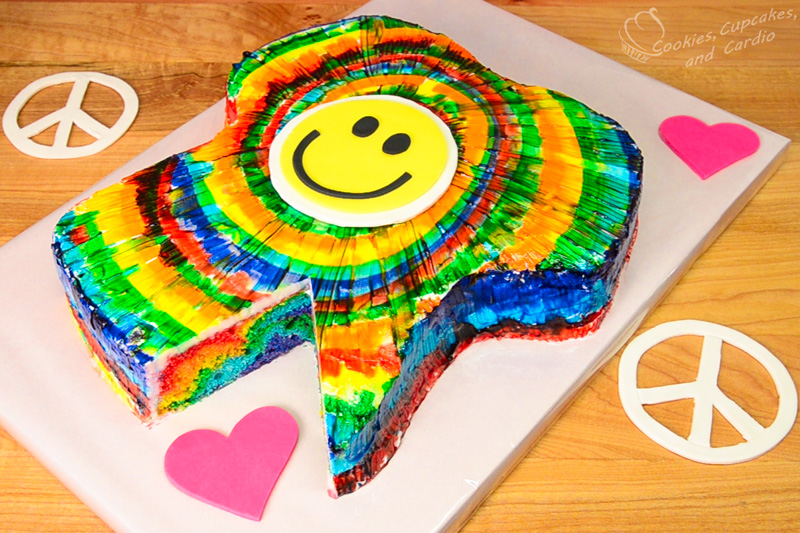
I used to run a home based bakery business (until my love of YouTube took over!) and during that time, my t-shirt shaped cake pan was one of my most used pans out of all of my shaped cake pans. I had so many of them that they were the first thing that I sold when I closed the business. I was SO happy to get rid of them.
I have a love/hate relationship with shaped cake pans- they are great as you don’t need to carve or structure the cake, but, they take up so much room! When I decided which ones to keep and which to sell, I kept the ones that I used for multiple projects, knowing that I would be able to use them in future videos, in multiple ways. This t-shirt pan can also be used for other cakes, which I’m sure I’ll be showing you at a later date.
Unfortunately as with all good things, they come to an end. Wilton has “discontinued” this cake pan, but I was able to find another similar cake pan on Amazon, and it you can get it here. It is basically the exact same cake pan, just with sharper, deeper sides. If you’re not up for purchasing a cake pan, you can always freehand carve a t-shirt out of a rectangle cake. That would save you a little bit of money, and a t-shirt is a pretty simple shape to make. Besides, we’ve all seen one so we should have a pretty good picture in our heads as to what one looks like!
I have wanted to make a cake into a tie-dye design for a while now, and when thinking up a reason, and a cake design, a t-shirt seemed like the natural way to go. When I think of tie-dye, I think t-shirts, peace, love and the 60’s! You can do this design on any cake- round, rectangle etc. To recreate it, start the piping gel spirals at the center of the cake, and work your way out, alternating colours as you want to.
Keeping your brush clean is the most onerous activity throughout the whole process. I would imagine having 100 brushes would make it a lot easier, but who has that many brushes? Washing the brush is important, as it helps to prevent the spreading of the colours where you don’t want them to be. You don’t HAVE to wash it, but your cake may end up being a lovely shade of brown if you don’t.
I hope you enjoy this project! Peace.
Tie Dye T- Shirt Cake
Ingredients:
- Vanilla cake batter coloured red, orange, yellow, green, blue, purple
- White buttercream
- Piping gel coloured red, orange, yellow, green, blue, purple or clear piping gel with red, orange, yellow, green, blue, purple gel paste
- Fondant (yellow, white, black)
Penguins of Madagascar mini figurines:
http://amzn.to/1yTZdA7
Procedure:
- Preheat the oven to 350F, and grease a T-shirt shaped cake pan.
- Spoon cake batter into cake pan in a random pattern, piling piles of different colours onto each other. Continue until all the batter is used up.
- Bake in the oven for 45-55 minutes, or until cooked completely. Allow cake to cool before proceeding.
- Place t-shirt cake onto a cake board, and cover in white buttercream.
- Start in the middle of the chest area of the shirt, and using a spiral patter, squeeze each of the piping gel colours towards the outer edges of the cake.
- Once cake has all of the piping gels on the top, using a clean paint brush, “wipe” the piping gel’s from the center toward the outside of the cake. When brushing between light and dark colours, clean brush so colour mixing doesn’t occur. Continue to work the wiping from the centre to the outside until all of the buttercream has been covered in blended piping gel.
- To make the smiley face, roll out the yellow fondant and cut into a circle. Next, roll the white fondant out and cut a slightly larger circle. Attach the yellow circle to the white circle using a small amount of water, brushed on with a paint brush.
- Roll the black fondant out and cut out a smiling mouth and eyes. Attach those with small amount of water.
- Place fondant smiley face onto the center of the t-shirt cake.
- Keep in the fridge until ready to serve. The cake can be stored in the fridge for 2-3 days.


