Having read parts 1 and 2 on edible printing, you’re now ready to put a cake together!
In the first video, I showed you how to set up your printer and what you need as far as ink, and frosting sheets. In the second video, I showed you how to layout a design using Icing Image’s iidesign program (which is an online software subscription you can buy). And in the third video, I show you how to incorporate the previous two videos together to create a butterfly cake using edible frosting sheets.
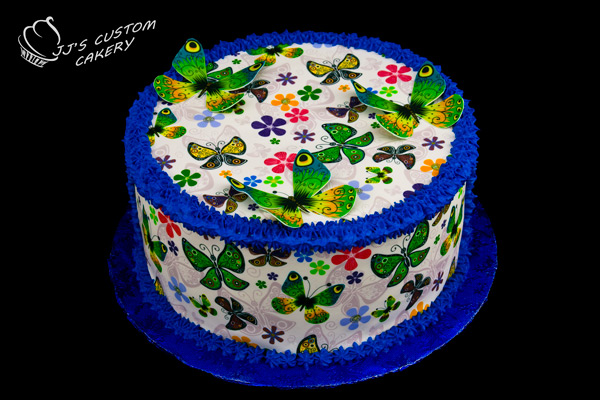
You can use any images that you want for a project such as this, but I chose this beautiful butterfly design for happy thoughts of spring! This design paper comes for Icing Images iidesign online software. Check out Part 2 if you want more information on this.
To make this cake, you will need to have printed frosting sheets, and for the butterflies, you will will need enlarged ones from the original design. You will also need to have cake that is coated in buttercream or fondant, and you will need buttercream (frosting) to cover up the frosting sheets lines and corners.
The cake in my video and in the images, is an 8″ round cake. I used one sheet of legal, and one sheet of letter and 3 butterflies. As I learned in Grade 8 woodworking, measure twice, cut once! I cut the legal sheets to match the height and circumference of the cake, and I used the letter sheet to cut the circle for the top of the cake.
Using the buttercream, I piped a simple star border along the top outside edge of the frosting sheet, along the seams where the sheets met on the sides, and along the bottom border of the cake.
I hope you enjoyed this three part series of video tutorials on Edible Printing!


