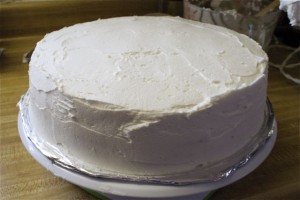
Dirty Ice. Base Ice. Crumb coat.
All of these terms mean the same thing; putting a layer of icing on your cake before you get to the decorating part! This step helps you get that “professional” look to your cake . . . a smooth finished product. Also, if you are using fondant, this step can provide tasty layer to your cake . . . it tastes MUCH better than just placing fondant on top of your cake.
Crumb coating is little bit more involved than slapping some icing on the cake and spreading it around with a butter knife . . . though you technically can do that! But, it’s not called a crumb coat for nothing. You’re going to find your base layer riddled with crumbs! If you have used a boxed cake mix, you will find that your cake is likely to be quite crumbly . . . more so than homemade cake batter. In order to deal with this challenge, the first step is to put your cake into the freezer for a couple of hours (after it has completely cooled) and there will be less chance for crumbs to dirty up your icing.
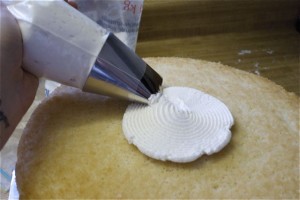
Second, it’s on to the crumb coat! You will need a LARGE tip. Here, I have used Wilton Tip #789. It’s big people.
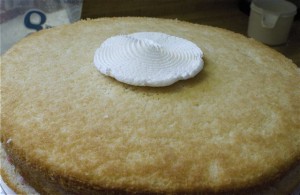
Start in the centre of your cake, and rotate your cake with a cake turntable, keeping your tip moving towards the outer edge of the cake.
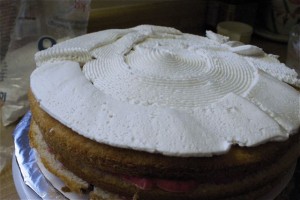
Continue working towards the outside, spinning your turntable.
When you get to the edge of the cake, allow your tip to overlap the outside edge by about a 1/4″.
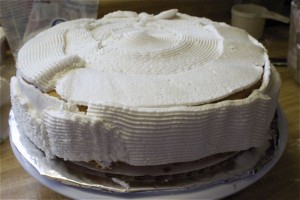
Repeat process for the sides of the cake. To finish, use a cake spatula to create a smooth finish. Decorate as desired!


Hi Jenn! Found your blog through a comment you left on mine! To answer your question, I used the “paper towel method” to smooth out my cake after frosting. I use a frosting that crusts which allows me to place a paper towel (Viva brand) onto the frosted cake and to smooth it with my fondant smoother. It’s my favorite newfound cake tip!
Love this tutorial! I will have to send it to my sister in law who always has a crumb-y cake! lol!